Everything You Need to Know About 5S Pipe Marking
There are multitudes of different facilities that utilize piping systems. All pipe systems are used to transport a variety of substances such as hazardous chemicals, water, and even steam across buildings to where they will eventually be utilized or stored. Surprisingly enough, even water can pose a hazard to the workplace. This is exactly the reason why all pipes must be labeled with the appropriate pipe markings.
Luckily you don’t have to go into this enormous task blind. There have been several pipe marking standards put into place that take care of both hazard protection for your employees and does so in a way that is standardized across all facilities.
Why Must Pipes be Labeled?
Did you know pipe labels are required by law? That’s right! If you don’t have your pipes labeled correctly or they’re completely absent, you could be slapped with a hefty fine from OSHA. However, there are of course exceptions for some businesses based on the size of the building, what type of building it is, and the number of employees in the building.
With that being said, we still recommend everyone label their facility’s pipes. Not only is the process intuitive, but you can find the right labels easily and practically never have to replace them if they’re taken care of properly. Not only that, but workplaces are frequently subject to change. You may decide to expand your employee base or even build another building. Label your pipes now so you don’t have to worry about potential surprise OSHA fines in the future.
It’s also worth mentioning that pipe markers are an integral part of workplace safety in that they help employees not only complete maintenance tasks correctly and efficiently, but those labels also allow them to do so in the safest manner possible.
Imagine a scenario where an employee needs to shut off a potable water valve, but instead since there was a lack of proper pipe markings, they ended up opening a hot water valve. That employee now has terrible burns from near boiling water that they accidentally released onto themselves. Imagine if it were toxic or corrosive fluids that were released instead. These types of injuries, and in the worst cases fatalities, are completely preventable with the use of proper pipe marking practices.
The Importance of Pipe Marking in 5S Facilities
If you’ve ever been in a work environment that prioritizes cleanliness and organization, you might have heard of the 5S method. We love 5S here at 5S Today because we know it’s effective at creating an improved workplace environment for both the employees and the work they perform.
There are five parts to 5S:
- Sort through all workplace materials and only keep what you need. Everything that has been determined not useful should be removed from the area.
- Set in Order includes all the items that you chose to keep. These should be placed in logical areas for easy access.
- Shine, and by that we mean do some deep cleaning. Clean and maintain the newly organized space as well as set some routine cleaning procedures to follow.
- Standardize the new process by making rules to follow for the previous three steps. Standardization can include the use of charts, list, etc.
- Sustain 5S by developing a workplace culture that reinforces positive self-discipline in terms of following the newly developed process.
What you might not know is that 5S isn’t just about those two things. After both organization and cleanliness have been achieved, the organization can then direct their 5S techniques to work towards maximizing both efficiency and profit. And you know what, safety believe it or not, is an integral component to 5S. A clean and organized workspace is a safe one, and a safe and organized space is conducive to an explosion of productivity and value creation.
If you have a 5S program in the works don’t leave pipe marking out! Even if you aren’t participating in 5S, pipe marking is still a requirement. Regardless, we’re saying to put up those wonderful little visual communicators so you can improve efficiency, productivity, and safety in your workplace.
The History of ANSI/ASME A13.1
Pipes have been used since the time of Ancient Egypt and Roman rule, but these normally just carried potable water. It wasn’t until 1908 did the talk of labeling pipes came up during an ASME meeting. The article that sparked the discussion was called “Identification of Power House Piping by Colors.” Companies began to mark their pipes with unique color codes, but there was yet a standard to be made for universal recognition in American businesses.
Finally, by 1928 the American Standards Association, a past version of ANSI, published a color-coding scheme for piping systems. This new standard helped to alleviate any confusion and errors made when workers went from one workplace to another during the time of unique pipe marking color schemes.
From then on, the ANSI/ASME A13.1 standard has been revisited for improvements throughout its lifetime. The most recent revision was released in 2020 to add the use of GHS pictograms on the special labels as well as provide a definition for oxidizing substances.
ANSI/ASME A 13.1 Pipe Labeling Standards
While it may seem as though there’s a lot that goes into determining pipe identification requirements, the A13.1 standard is one of those that is simple and easy to understand. You can find the standard in its entirety on ANSI’s website. We always recommend that employers purchase these standards to use along with supplemental resources such as our extensive pipe marking guide. Like all our informational content, it doesn’t cost anything to download!
Overall, this basic pipe labeling standard exists to make sure your employees stay safe and aware of their surroundings while on the job. And, just as the name suggests, pipe marking standards exist to make sure all facilities follow the same rules. Despite being almost 100 years old, the goal of ANSI/ASME A13.1 is still the same, and that is to make sure employees and first responders can go from one facility to another and still have relevant knowledge about these labels and the corresponding pipe contents to do their jobs correctly, efficiently, and safely.
The Basic Components of Code Compliant Pipe Labels
It must be noted that while following ANSI and ASME standards is voluntary, the catch is that OSHA has adopted the A13.1 pipe marking standard through what is called incorporation by reference. This means that OSHA didn’t strictly make the standard but came to the agreement that this standard is a best practice method that they have chosen to enforce due to the hazards that have the potential to endanger employees.
With that being said, the ANSI/ASME A13.1 standard has been endorsed by OSHA, making it a legal requirement. Meaning that if not followed, you could receive a fine for non-compliance. The A13.1 pipe marking standard does have a few basics components and guidelines that you need to know to have perfectly labeled pipes.
- The legend consists of the name of the hazardous material being transported through the pipeline. These can also be abbreviations for hazardous materials that are too long to name on the label itself. GHS pictograms were recently allowed to be added to pipe markings if necessary. Other symbols include arrows to denote the direction of flow.
- The color of a pipe label is integral to it’s meaning. Color signifies the properties of the hazardous substance. That can be anything from flammable to corrosive, or toxic.
- The label and letter size on pipe labels is to ensure easy visibility of the pipe markings. Larger pipes require larger pipe labels and text, likewise with smaller labels. The ratio must be the same for maximum visual communication.
- The placement of pipe labels is integral for visibility purposes. ANSI and ASME have determined that there can’t just be one pipe marker for a long stretch of piping. There’s also the trouble of angling pipe markers in a way that is easy to see and read.
- Dealing with any abandoned piping is important too! Whether your pipes have something in them or not, all pipes must be labeled. This is for both maintenance purposes and in case the company wants to use those pipes again one day. Knowing what was in those pipes can be immensely helpful in terms of safety.
These are the basic components of pipe marking that every business must take heed of for OSHA compliance. Now let’s go through the intricacies of each so you’ll be prepared when the times comes to mark your own pipes with the appropriate labels.
Deciphering Pipe Label Legends
According to the pipe labeling standard, “Legends shall be brief, informative, pointed and simple for greatest effectiveness.” Well, what is a pipe label legend? It’s the words on the labels of course!
Naming the contents of a pipe holding hazardous substances is the primary mode of pipe identification for employees. You may see pipes labeled “AMMONIA” or “HOT WATER,” and even “SULFURIC ACID,” or perhaps there will be an abbreviation you don’t recognize. All of these should be contained in a printed or digital file that can be easily accessed by workers. This way they have all the information they need to identify pipes correctly.
That’s not all a legend will contain though. The users must have directional arrows to indicate the flow direction of the material. In 2020, ANSI’s standard was also changed to allow for the use of GHS pictograms as part of the communication as well.
Pipe Marking Color Scheme
The color scheme of these labels is one of the most important factors that goes into employee and first responder recognition. Colors work as the basis of information for the potentially hazardous pipe contents of the pipe. This is because people will most likely see the color first before they even read the label. The following is a list of the colors used for pipe labels and the properties those colors are connected to:
- A yellow label with black text must be used for pipes that contain flammable fluids or vapor, or an oxidizing agent.
- A brown label with white text must be used for pipes that contain combustibles fluids or gases.
- An orange label with black text must be used for pipes that contain toxic or corrosive fluids.
- A red label with white text must be used for pipes that contain fire suppression substances
- A green label with white text must be used for any water not intended to be used as fire suppression
- A blue label with white text must be used for pipes that contain any vapor or gas under pressure that doesn’t fit in another category.
- Check the pipe marking standard for any user defined combinations for unique workplace pipe markers.
Remember, pipe contents are nothing to be trifled with. Having the appropriate color scheme can greatly help your employees while they work.
Size and Text Height
Easy readability is incredibly important with pipe markers. The standard makes this clear by specifying the size of any letterings on a range of small to large pipe diameter. The standard also notes that for pipes less than 0.75” in outer diameter that the pipe be labeled with a permanent tag. This tag must be readable to be effective.
The outside pipe diameter requirements are as follows:
- A 0.7” to 1.3” width must have a label 8” in length and include 0.5” in text height
- A 1.4” to 2.4” width must have a label 8” in length and include 0.7” in text height
- A 2.5” to 6.7” width must have a label 12” in length and include 1.3” in text height
- A 6.8” to 10” width must have a label 24” in length and include 2.5” in text height
- A pipe over 10” in width must have a label 32” in length and include 3.5” in text height
With all that being said, make sure you measure your pipe’s circumference before diving into label creation! Having the right size label can mean legibility or lack thereof.
The Rules of Label Placement
Figuring label placement is often the most difficult part of visually marking a facility. But again, A13.1 has the answer for you! Let’s dive into where you should probably place those shiny new pipe markers:
- Frequency – Labels must be placed at least every 25-50' on a straight run of pipe so they are easy to see and follow. It’s also important to add a label when a pipe changes direction.
- Obstructions – If a pipe passes through a wall or around a corner, pipe labels should be placed on both sides so people see them from any angle.
- Lighting – Pipes are often in areas that don't get too much light such as under flooring or up in rafters. To combat this, it’s helpful to ensure enough light is reaching them so people can see both the color of the label and the legend as well.
- Access Points – A label must be visible at the access points of a pipe. This will help the maintenance team quickly determine the contents of a pipe before beginning a task.
- End Points – At either end of the pipe, there should be a label so that people using the pipes can quickly see what’s in them.
You’re going to need a lot of pipe labels to effectively label your facility. Remember, only one is not sufficient.
Abandoned Piping Protocol
Did you know that even unused pipes must be labeled? That’s right! Make sure to include abandoned pipes in your pipe marking project. These also still need to be labeled per the ANSI standard. This is because pressurized fluid is oftentimes used to protect the inside of the pipe from corrosion, there might be some residual hazardous materials within the pipe itself as well.
Labeling abandoned pipes is often done with a white label and black text, with the text on the label indicating the contents.
Other pipe Marking Regulations and Standards
Since we’ve covered the basic of pipe marking from ANSI/ASME A13.1, we do have to say there are other more specialized pipe marking standards out there. Some facilities work differently than others, so much so that to keep their workers and visitors safe, they must implement extra precautions when it comes to effectively communing with all parties involved.
Some of the more common standards for pipe marking in special facilities include:
- Ammonia pipe marking standards made by the International Institute of Ammonia Refrigeration (IIAR).
- Medical institutions use the NFPA 99/CGA C-9 standard since they primarily deal with gases, many of them being extremely flammable.
- Marine grade pipe marking utilizes ISO/DIS 14726 for sea fairing vessels. This is a special case because everything must be contained on the ship itself.
- Water treatment facilities often follow the 10 States Standards for marking pipes in their facility.
Pipe Marking Tips
Now that you know everything that there is to know about marking your facility’s pipes according to the appropriate standard, we can dive into some easy tips to remember.
- Always train new employees on the meanings of pipe labels before they start the job. This can help prevent major injuries and mistakes.
- Be familiar with the right standard. There’s no use in labeling your facility if you don’t use the right color scheme or format for pipe markings.
- Find the right balance between too many labels and too little! No one likes being assaulted with too many visual reminders, but there must be enough visual reminders to be able to feel safe and confident in the workplace. Finding that happy medium is essential.
We also can’t emphasize enough for you to get the A13.1 standard in your hands before you start labeling. Making a mistake while printing out hundreds of labels can be costly in not only the material but also the OSHA fines.
Pipe Marking Tools
As one of the leaders in workplace safety labeling, 5S Today is here to help you find all the materials you need to correctly label your workplace. For pipe marking, we have the perfect solution for you—an industrial label printer!
Purchasing your very own label printer will not only make printing out the exact labels you need easier, but it will do so in a fraction of the time and cost compared to sourcing pre-made pipe marking labels from another company.
Best Selling Pipe Marking Printers & Packages
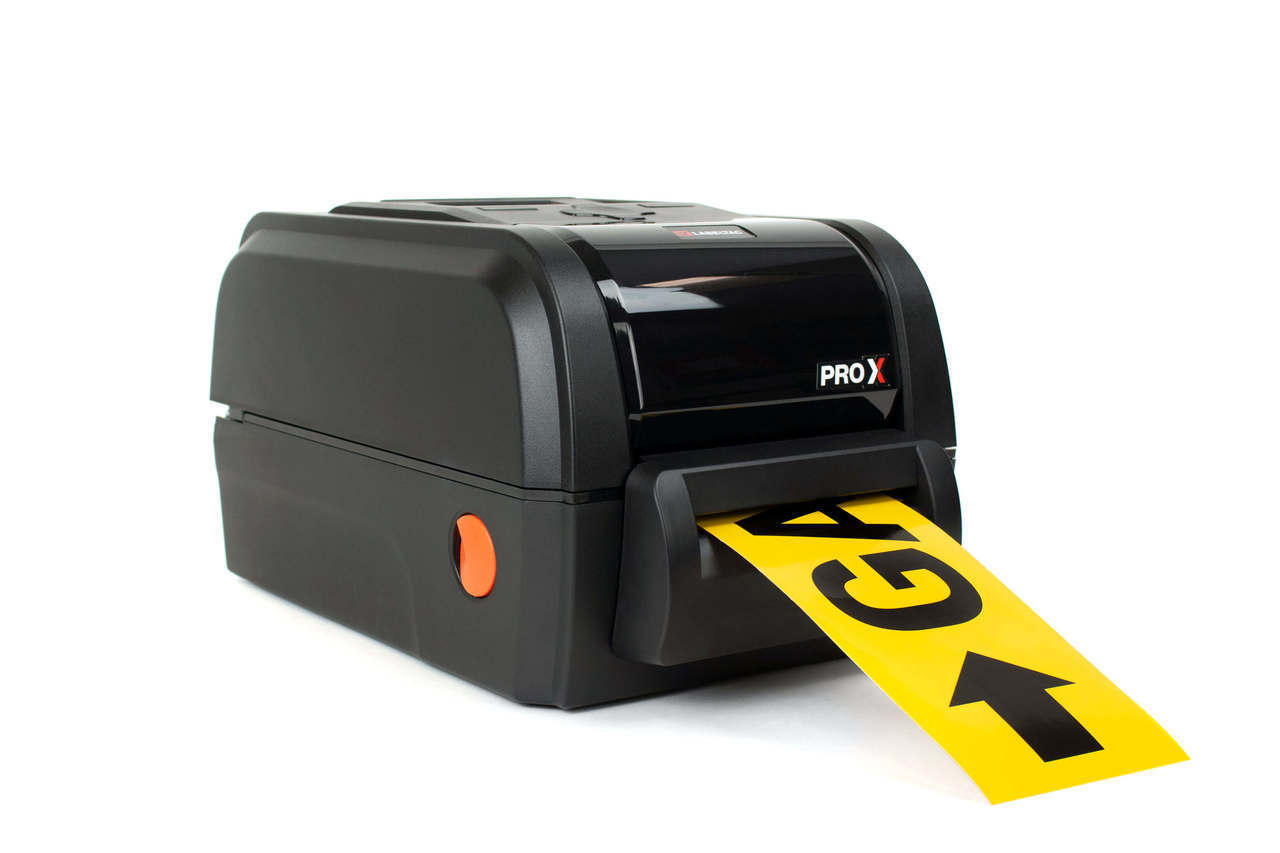
LabelTac® Pro X Industrial Labeling System
- Prints Labels 1/2" to 4" wide and 40" long
- Multiple ribbon and tape colors available
- UV and chemical resistant labels
- Built-in templates and symbols
- Compatible with Microsoft Word, Excel, OpenOffice and other Windows based programs
- Easy to use
LabelTac® Pro X Pipe Marking Bundle
- Everything you need to get started making pipe marking labels
- Packages contains printer, ribbon and labels
- Multiple colors included
- Labels are UV, chemical, weather, water, smear and wear resistant


